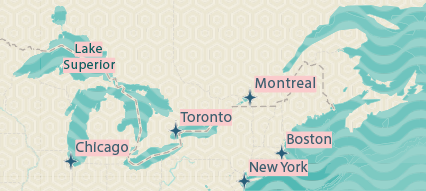
After adding geographic content to your mapboard in the compilation window, use the Sync button  to download this content to Adobe Illustrator or Adobe Photoshop as artwork.
Caution:
If you're using an .aix file, don't change the layer names in the .ai file that correspond to the map frames in your ArcGIS Pro project; otherwise, syncing will fail. Maps for Adobe Creative Cloud matches the mapboard name to the name in the .ai file to sync and align the layers to the correct map or map frame.
Note:
For ArcGIS Enterprise accounts, see the associated configuration requirements.
What does Sync do?
When you sync your work from the compilation window, a new file relevant to the host application is created or the associated file is modified. In the case of Illustrator, an .ai file is created or modified, and in the case of Photoshop, it's a .tif file. When the extension creates a new file, it's named the same as the mapboard. The file name isn't changed when you sync to an existing file. Syncing layers from an AIX-generated mapboard won't affect the name of the existing .ai file or its map layer names.
The artboard in the synced file reflects the geographic extent, dimensions, and scale of the mapboard. It also contains the geographic content that you specified in the compilation window.
By default, all synced map files are downloaded to your Documents folder directory under Documents\Adobe. If this folder doesn't exist, and you have sufficient permissions on your local computer, it will be created for you.
Note:
You can change the download location in the extension settings.
You can choose which layers in your map to sync as artwork by using the Toggles Sync button. This allows you to keep layers in your map and choose if and when they are downloaded.

After the sync is complete, the Layers panel in Illustrator or Photoshop is updated with the map content. (For ArcGIS organizational accounts, the downloaded results can vary depending on your mapping profile setting.) The Compilation window progress indicates when it's successfully completed. The Sync button  is enabled again to allow you to sync additional map content to the same Illustrator or Photoshop file.
After you successfully sync the map, you can expect the following results:
- Sync status updated—A status bar appears in the compilation window with a success (or failure) message.
- Map downloaded—A new file is created or updated with layers that reflect the map content in the compilation window. The structure and organization of layers varies between Illustrator and Photoshop. See Differences in Illustrator and Photoshop synced files.
Note:
Labels are highlighted in pink in your downloaded map if the font used in the source layer is not available on your machine. In Illustrator, click the Type menu and choose Resolve Missing Fonts to see a list of missing fonts. If the font is available in Adobe Fonts, you can activate it by checking the corresponding box.

- Processes completed—Processes run on the downloaded map if you configured any to run on sync.
- Layer sync toggled off—Toggling sync off for layers you've already downloaded allows you to add and sync more layers without removing the previously synced layers from your map in the compilation window. Once you've synced your map and created an artwork file, you can come back to the compilation window and download new layers.
Note:
To sync a layer multiple times, turn on the Toggles Sync button
 . This will enable the layer once more for sync.
 - Mapboard is locked—The mapboard is locked in place (indicated by a solid blue border) and the following properties are disabled to ensure that any content you subsequently add and sync via the compilation window aligns geographically to the previously synced content:
- Position
- Scale
- Extent
- Mapboard size
- Image resolution (PPI)
- Projection
Tip:
If you need to change the location, scale, or size of the map area that was just synced, make a copy of the mapboard by clicking its Duplicate button
 in the Mapboards window, and update the new mapboard. (You cannot duplicate an AIX-generated mapboard.)
Duplicating a mapboard copies its properties and the compiled map, and allows you to edit map scale, dimensions, geographic extent, projection, and image resolution (PPI). After you create the duplicate and make changes to the new mapboard, click the Sync button
  to download the map layers to a new file in Illustrator or Photoshop.
 - Map embedded into the file—If you are signed in with an ArcGIS account, the compiled layers are also embedded with the map.
This is indicated by the Embed map icon
 next to the name of the mapboard.
Any changes made to the compilation after the map has been embedded will persist in the file when you save it.
 Note:
 Requires an ArcGIS or Plus account. Compiled map will not be embedded in the file with complimentary access, however layers will be downloaded as artwork.
 To remove the embedded map from the synced file, delete the mapboard using the Delete map button
 in the Mapboards window while the file is open, and save the changes.
 Caution:
This action cannot be undone.
Remove clipping paths
If you're using the Default mapping profile (available to ArcGIS organizational accounts), some clipping paths are kept in the downloaded map to preserve the map's appearance. Examples include the following:
- Maps with a vector tile layer or vector tile basemap, in case it uses patterns or imagery as part of the design (such as images for symbols)
- Polygon layers with transparency, such as building footprints in some vector tile basemaps
To remove all the clipping paths in an Illustrator document, complete the following steps:
- Lock or hide any layers for which you want to keep clipping paths.
- From the Illustrator Select menu, choose Object, and click Clipping Masks.
- Press Delete to remove the selected clipping paths.